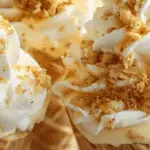
These Banana Pudding Cheesecake Cones are the perfect hand-held dessert that combines creamy, tangy cheesecake filling, sweet banana pudding flavors, and a delightful crunch from waffle cones. They’re easy to make, fun to eat, and a guaranteed crowd-pleaser.
Why You’ll Love This Recipe
I love how these cones bring together all my favorite dessert elements—rich cheesecake, nostalgic banana pudding, and crisp cone indulgence. The individual portions make serving a breeze, and everyone gets their own treat. Plus, prep is quick and no baking is required—perfect for hot summer days or when I want something impressive with minimal effort.
ingredients
(Here’s a tip: Check out the full list of ingredients and measurements in the recipe card below.)
-
Waffle cones (6–8)
-
Cream cheese, softened
-
Sweetened condensed milk
-
Sour cream
-
Vanilla extract
-
Instant banana pudding mix
-
Milk
-
Bananas, sliced
-
Whipped topping
-
Vanilla wafer cookies, crushed
directions
-
In a medium bowl, beat softened cream cheese until smooth.
-
Mix in sweetened condensed milk, sour cream, and vanilla extract until creamy.
-
In a separate bowl, whisk together banana pudding mix and milk until thickened—about 2 minutes.
-
Fold the pudding mixture into the cream cheese mixture until combined.
-
Gently fold in a cup of whipped topping for extra lightness.
-
Spoon or pipe the cheesecake mixture into waffle cones, filling them almost to the top.
-
Layer sliced bananas on top, then add a dollop of whipped topping.
-
Sprinkle crushed vanilla wafer cookies for crunch and garnish.
-
Serve immediately, or chill in the fridge for 15–20 minutes for a firmer texture.
Servings and timing
-
Makes 6–8 cones
-
Prep time: 20 minutes
-
Chill time (optional): 15–20 minutes
-
Total time: Approximately 35–40 minutes
Variations
-
Chocolate drizzle: Drizzle melted chocolate or Nutella over the cones before serving.
-
Different pudding flavors: Swap the banana pudding mix for vanilla, butterscotch, or chocolate pudding.
-
Fruit twist: Replace sliced bananas with fresh strawberries, blueberries, or diced peaches.
-
Nutty crunch: Top with chopped pecans, walnuts, or almonds instead of vanilla wafers.
-
Mini cones: Use smaller waffle cones for bite-sized dessert treats.
storage/reheating
Because these are no-bake and contain fresh bananas and whipped topping, I recommend enjoying them the same day. If needed, store assembled cones in an airtight container in the fridge for up to 24 hours, but note that the waffle cones may become soft. For a fresh crunch, store the cheesecake mixture separately and assemble just before serving.
FAQs
How far in advance can I make these?
I can prepare the cheesecake mixture and banana pudding up to a day ahead and store it in the fridge. I assemble the cones right before serving to keep them from becoming soggy.
Can I freeze the cones?
Freezing isn’t recommended because the bananas and whipped topping don’t freeze well, and the cones lose their crispness. They’re best enjoyed fresh.
Can I use regular pudding instead of instant?
I suggest using instant pudding mix because the texture sets quickly without cooking. Regular pudding works, but it may be thinner and less stable.
Can I make these gluten-free?
Yes! I can use gluten-free waffle cones and gluten-free vanilla cookies to keep the recipe gluten-free.
Can I make them dairy-free?
For a dairy-free version, I’d use dairy-free cream cheese, coconut milk-based whipped topping, and substitute the sweetened condensed milk with a dairy-free alternative.
Conclusion
These Banana Pudding Cheesecake Cones combine creamy cheesecake, nostalgic pudding flavor, and crunchy waffle cones into a fun, no-bake dessert. They’re easy to prep ahead, customizable with different toppings, and sure to delight anyone who tries them. I hope you enjoy making them as much as I enjoy eating them!
Banana Pudding Cheesecake Cones
5 Stars 4 Stars 3 Stars 2 Stars 1 Star
No reviews
These Banana Pudding Cheesecake Cones are the perfect hand-held dessert that combines creamy, tangy cheesecake filling, sweet banana pudding flavors, and a delightful crunch from waffle cones. They’re easy to make, fun to eat, and a guaranteed crowd-pleaser.
- Author: Ella
- Prep Time: 20 minutes
- Cook Time: 0 minutes
- Total Time: 35–40 minutes
- Yield: 6–8 cones
- Category: Dessert
- Method: No-Bake
- Cuisine: American
- Diet: Vegetarian
Ingredients
- 6–8 waffle cones
- 8 oz cream cheese, softened
- 1 can (14 oz) sweetened condensed milk
- 1/2 cup sour cream
- 1 tsp vanilla extract
- 1 package (3.4 oz) instant banana pudding mix
- 1 1/2 cups milk
- 2 bananas, sliced
- 1 cup whipped topping, plus more for garnish
- 1/2 cup vanilla wafer cookies, crushed
Instructions
- In a medium bowl, beat softened cream cheese until smooth.
- Mix in sweetened condensed milk, sour cream, and vanilla extract until creamy.
- In a separate bowl, whisk together banana pudding mix and milk until thickened, about 2 minutes.
- Fold the pudding mixture into the cream cheese mixture until combined.
- Gently fold in 1 cup of whipped topping.
- Spoon or pipe the cheesecake mixture into waffle cones, filling almost to the top.
- Layer sliced bananas on top and add a dollop of whipped topping.
- Sprinkle with crushed vanilla wafer cookies for garnish.
- Serve immediately or chill for 15–20 minutes for a firmer texture.
Notes
- Best enjoyed the same day to preserve cone crunch and banana freshness.
- Store the filling separately and assemble just before serving for optimal texture.
- Try variations like chocolate drizzle, different pudding flavors, or fruit twists.
- Use gluten-free or dairy-free substitutions if needed.
Nutrition
- Serving Size: 1 cone
- Calories: 350
- Sugar: 28g
- Sodium: 180mg
- Fat: 18g
- Saturated Fat: 10g
- Unsaturated Fat: 6g
- Trans Fat: 0g
- Carbohydrates: 40g
- Fiber: 1g
- Protein: 5g
- Cholesterol: 35mg

