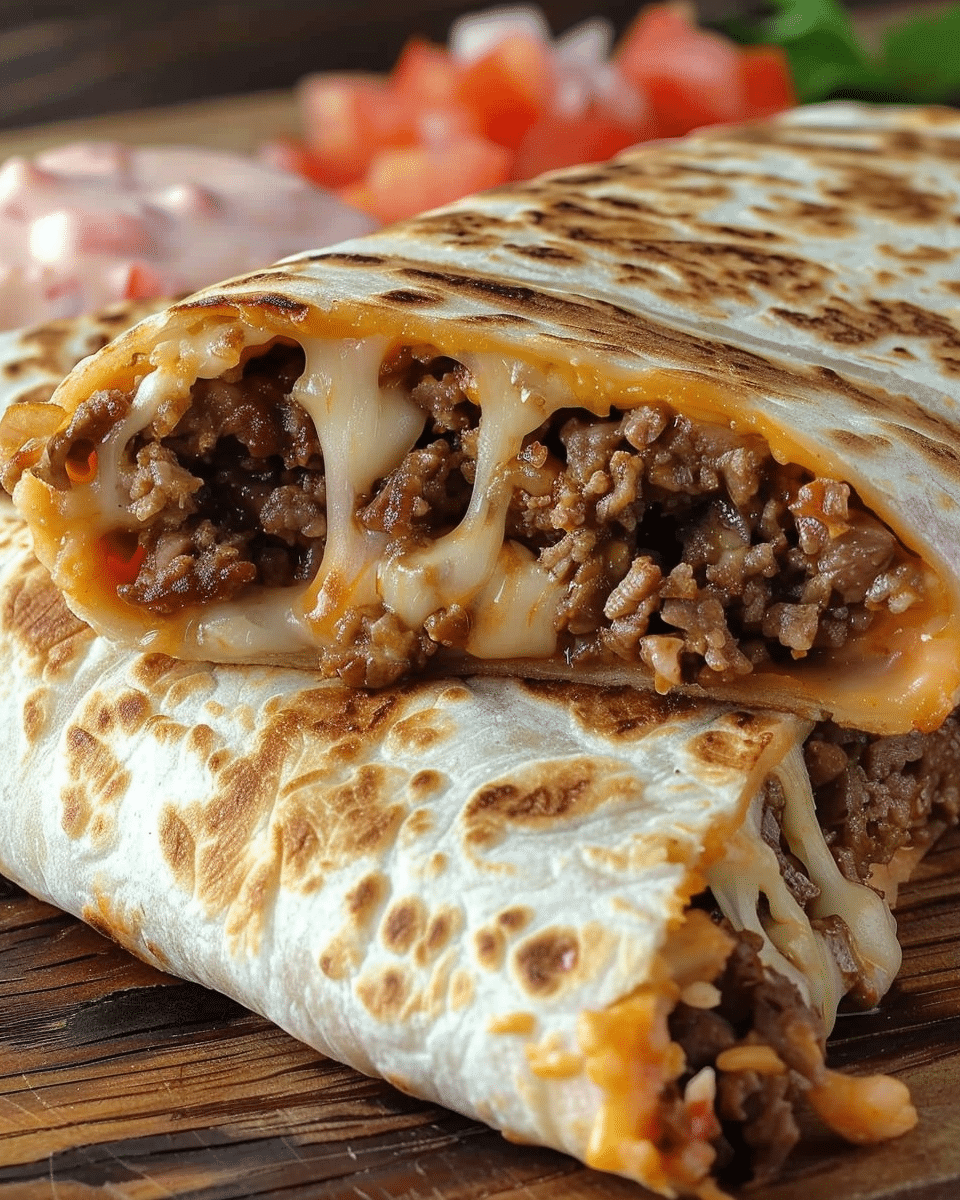
I love how this recipe turns a regular burrito into something extra — the crispy cheese crust on the outside takes it to another level. The spicy mayo gives it a kick, the beef is savory and rich, and the combination of soft and crunchy fillings keeps every bite exciting. It’s perfect for dinner when I want something filling, fast, and satisfying without needing a ton of dishes.
Ingredients
(Here’s a tip: Check out the full list of ingredients and measurements in the recipe card below.)
For the Ground Beef: ground beef olive oil onion, diced salt and black pepper smoked paprika dried oregano tomato sauce
For Assembly: large flour tortillas spicy mayo fried rice nacho cheese sauce sour cream tortilla chips (or strips)
Directions
Step 1: Cook the Ground Beef I heat olive oil in a large skillet over medium heat and sauté the diced onion until softened. Then I add the ground beef, breaking it up as it browns. Once fully cooked, I season it with salt, pepper, paprika, and oregano, letting the spices toast for a minute before pouring in the tomato sauce. I simmer it for about 5 minutes to let the flavors come together.
Step 2: Assemble the Burritos I lay out each tortilla and spread about a tablespoon of spicy mayo down the center. Then I layer on a spoonful of fried rice, a drizzle of nacho cheese, a dollop of sour cream, and some crushed tortilla chips for crunch. I finish with a generous scoop of the seasoned beef.
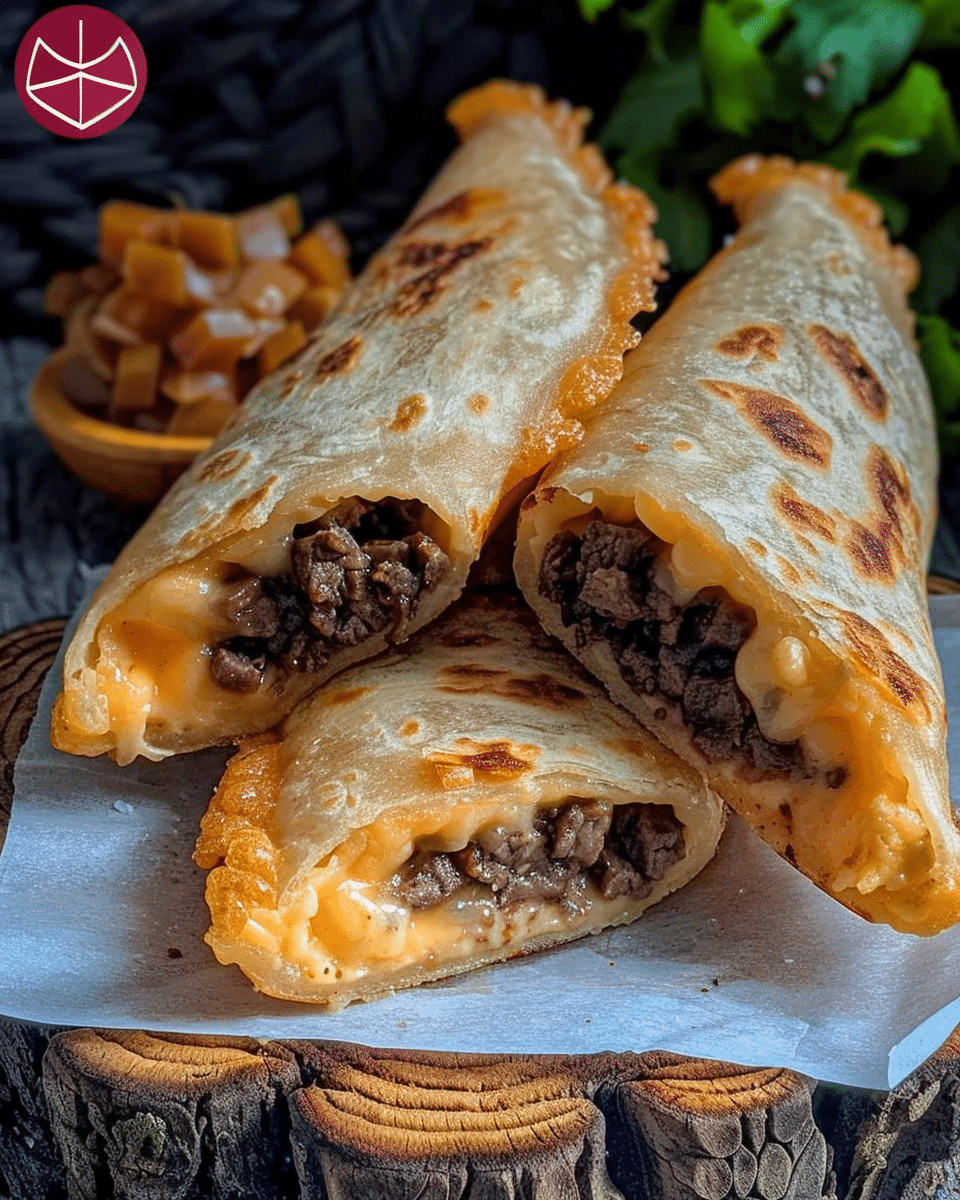
Step 3: Roll and Grill To roll, I fold in the sides and then roll from the bottom up, tucking everything in tightly. In a non-stick skillet or on a griddle, I sprinkle a bit of shredded Mexican cheese directly onto the hot surface. I place the burrito seam-side down on top of the cheese and grill it for 2–3 minutes per side until the outside is crispy and golden.
Step 4: Serve I serve these burritos hot, with extra spicy mayo on the side for dipping.
Servings and timing
This recipe makes 4 large burritos. Prep time: 15 minutes Cook time: 20 minutes Total time: 35 minutes
Variations
Sometimes I swap the beef for ground turkey or shredded chicken for a lighter version. I’ve also used leftover rice or Spanish rice instead of fried rice. If I want more heat, I mix hot sauce into the mayo or add sliced jalapeños. And when I want to go vegetarian, I use black beans and sautéed peppers in place of the meat — still just as delicious.
Storage/Reheating
If I have leftovers, I wrap each burrito in foil and keep them in the fridge for up to 3 days. To reheat, I unwrap them and warm them on a skillet over medium heat until heated through and crispy again. I avoid the microwave — it softens the cheese crust.
FAQs
Can I make these burritos ahead of time?
Yes, I assemble them ahead and keep them in the fridge un-grilled. When I’m ready to eat, I grill them fresh so the cheese stays crispy.
What kind of cheese works best for the crust?
I use a shredded Mexican cheese blend, but cheddar or Monterey Jack works great too. The key is using cheese that melts well and crisps up on the skillet.
Is there a substitute for fried rice?
Absolutely — I use plain cooked rice, Spanish rice, or even quinoa if I want a lighter version. Fried rice adds extra flavor, but it’s flexible.
How do I keep the burrito from falling apart?
I make sure not to overfill it, and I always roll it tightly. Grilling seam-side down first also helps it seal shut.
Can I freeze these burritos?
Yes, I wrap the un-grilled burritos tightly in plastic and foil and freeze them. I thaw overnight in the fridge and then grill as usual when ready to eat.
Conclusion
This Grilled Cheese Burrito is the kind of indulgent, flavor-packed dinner I look forward to all day. It’s loaded with satisfying textures and Tex-Mex flavor, and the crispy cheese crust takes it over the top. Whether I’m feeding a crowd or just treating myself to a big, bold meal, these burritos always hit the spot.
A Tex-Mex favorite packed with seasoned beef, fried rice, cheese sauce, and spicy mayo—all wrapped in a crispy, golden tortilla. Bold, cheesy, and totally crave-worthy.
Author:Ella
Prep Time:15 minutes
Cook Time:20 minutes
Total Time:35 minutes
Yield:4 large burritos (4 servings)
Category:Dinner
Method:Grilled, Assembled
Cuisine:Tex-Mex
Ingredients
→ Ground Beef:
1 lb ground beef
1 tablespoon olive oil
1 onion, diced
1 teaspoon salt and black pepper (adjust to taste)
1 teaspoon smoked paprika
1 teaspoon dried oregano
½ cup tomato sauce
→ Assembly:
4 large flour tortillas
3 tablespoons spicy mayo
1 cup fried rice
1 cup nacho cheese sauce
1 cup sour cream
1 cup tortilla chips (crushed or whole)
Instructions
Prepare the Ground Beef:
Heat olive oil in a large skillet over medium heat. Sauté diced onion for 5 minutes until translucent.
Add ground beef and cook until browned, breaking it up as it cooks.
Season with salt, black pepper, smoked paprika, and oregano. Stir to blend and bloom the spices.
Add tomato sauce, reduce heat, and simmer for 5 minutes. Set aside.
Assemble the Burritos:
Lay flour tortillas flat. Spread about 1 tablespoon of spicy mayo in the center.
Layer with fried rice, nacho cheese sauce, a dollop of sour cream, crushed tortilla chips, and the seasoned beef.
Wrap & Grill:
Fold in the sides and tightly roll the burrito from the bottom.
Heat a non-stick skillet or griddle over medium heat. For extra crisp, sprinkle shredded cheese on the skillet and place burrito seam-side down on top. Grill 2–3 minutes per side until golden and crispy.
Serve:
Serve warm with extra spicy mayo on the side for dipping.
Notes
Tightly wrap the burrito to avoid leakage while grilling.
Add shredded cheese directly to the pan before grilling for an extra cheesy crust.
Can be customized with beans, jalapeños, or hot sauce for extra kick.


