I love how this experiment clearly shows how each pie pan affects browning, texture, and structure. It helps me feel more confident choosing the right pan depending on the occasion, whether I’m baking a showstopper for the holiday table or a quick dessert to share with friends. The side-by-side comparisons give me practical insight I can use right away. Plus, the tests use the same trusted pie crust recipe each time, making the results more reliable.
Ingredients
(Here’s a tip: Check out the full list of ingredients and measurements in the recipe card below.)
All-purpose flour
Unsalted butter
Granulated sugar
Salt
Ice water
Directions
Prepare the pie dough using a standard pie crust recipe and chill it well.
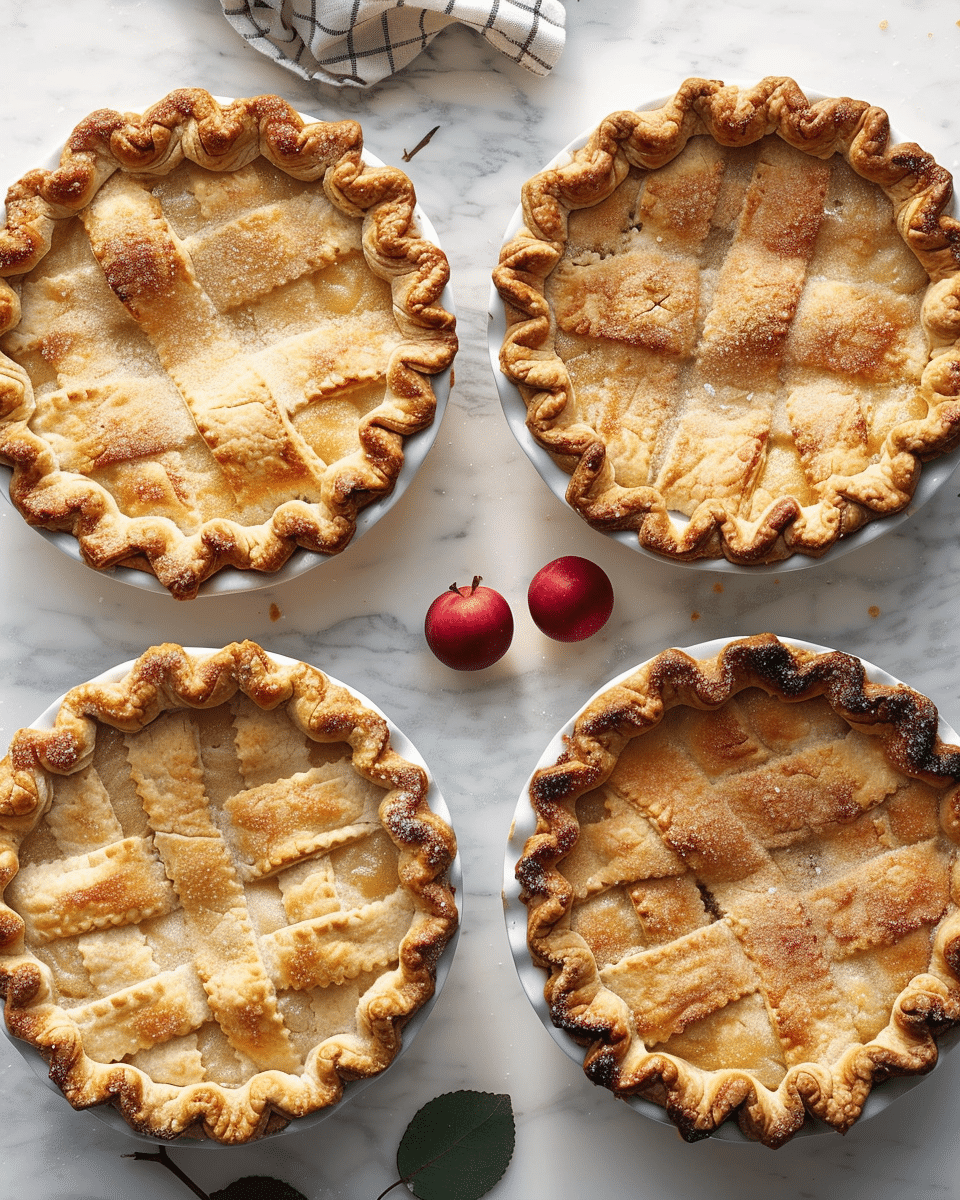
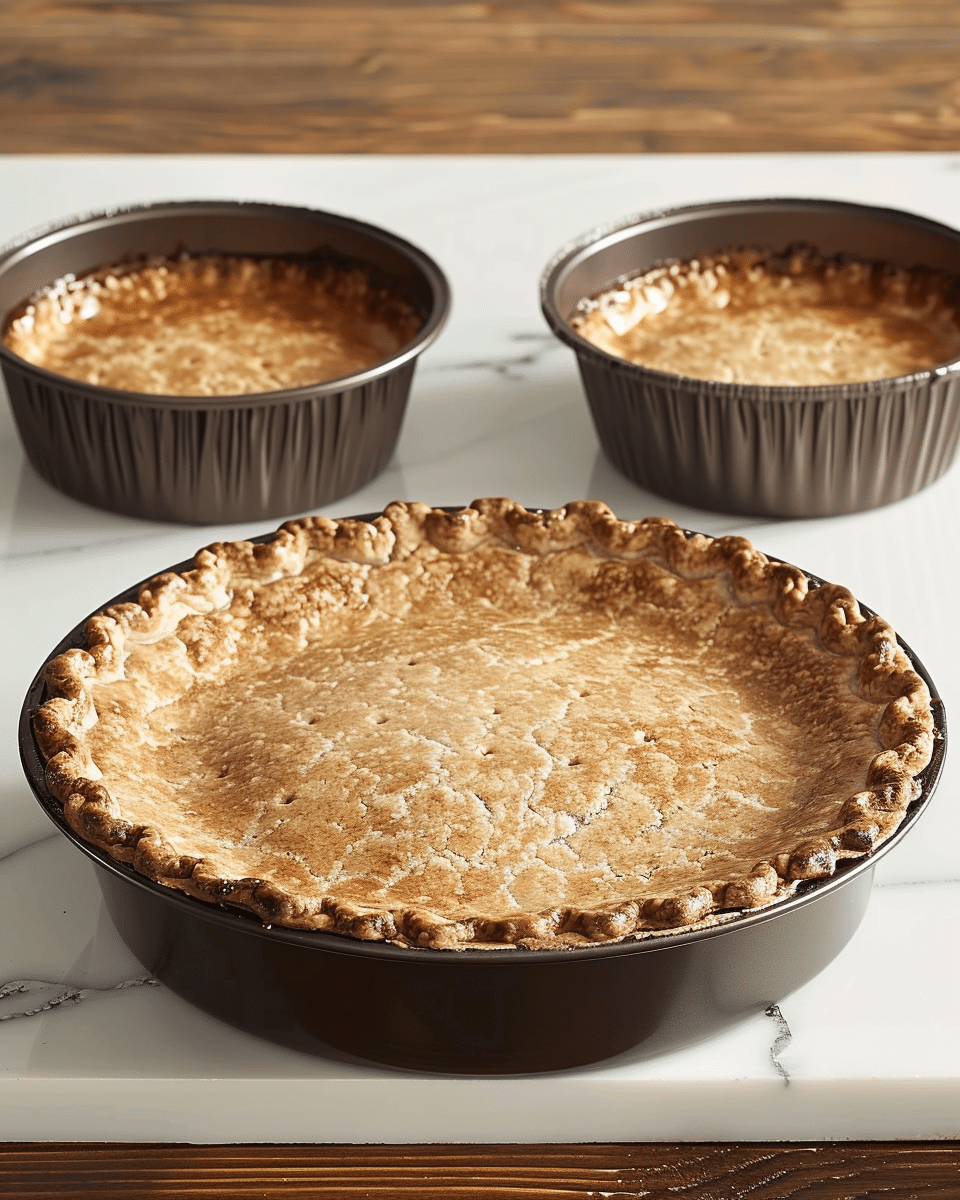
Roll out the crust and place it into each type of pan: glass, ceramic, metal, and disposable.
Blind bake the crusts at the same temperature for the same amount of time.
Remove the crusts from the oven and observe the browning, structure, and texture.
Compare results across pans, noting how well each crust held up and browned.
Servings and timing
Each pie crust was baked to fit a standard 9-inch pie pan and serves about 8 slices.
Prep time: 15 minutes Chill time: 30 minutes Bake time: 25–30 minutes Total time: About 1 hour 15 minutes
Variations
Use a deep-dish ceramic pan for fruit pies with a lot of filling. It holds more and often has beautiful edges for serving.
Choose a glass pan if I’m a beginner and want to keep an eye on how the crust is browning.
Opt for a metal pan when I need quicker heat conduction and a firmer crust base.
Go with disposable pans for gifting or transporting pies – no need to worry about getting the pan back.
Storage/Reheating
I always store leftover pie covered in the refrigerator for up to 4 days. If I want to keep it longer, I wrap the pie tightly and freeze it for up to 2 months. To reheat, I use a 350°F oven and warm the pie for about 10–15 minutes. This keeps the crust from getting soggy, unlike microwaving.
FAQs
What’s the best pie pan for beginners?
I prefer glass pie pans when I’m just getting started because I can see how the crust is browning on the bottom. That helps me learn when it’s fully baked.
Why did my crust not brown in a metal pan?
Even though metal conducts heat well, some metal pans (especially light or coated ones) might not brown as much. Using a dark metal pan or baking on a preheated stone can help.
Can I bake a frozen pie in a glass pan?
Only if it’s made of borosilicate glass, like Pyrex. If it’s not, the glass could shatter when going from freezer to oven. I always check to see if the pan is labeled oven-safe for such conditions.
Are ceramic pie pans worth the higher cost?
I think so, especially for presentation and deep-dish pies. They’re heavier and prettier, and they tend to produce evenly baked crusts if made from high-quality materials.
Do disposable pie pans bake pies well?
Yes, they do! Surprisingly, my pie in the disposable pan browned the most and was very sturdy. I just make sure to use a heavy-duty variety to avoid warping.
Conclusion
Choosing the best pie pan really depends on what I value most in my baking – presentation, ease, browning, or durability. After testing all four types, I found each one has its strengths. For beauty and even baking, I lean toward a ceramic pan. For visibility and ease, glass wins. Metal pans are reliable for quick heat transfer, and disposable ones are great when I’m on the go. No matter which I choose, I know now how much the pan can impact my pie, and that makes all the difference.
Discover the pros and cons of glass, ceramic, metal, and disposable pie pans with side-by-side baking tests. Learn which pie pan gives you the crispiest crust and why material matters for the perfect pie.
Author:Ella
Prep Time:15 minutes
Cook Time:25–30 minutes
Total Time:1 hour 15 minutes
Yield:1 pie crust (about 8 slices)
Category:Baking, How-To, Pie Crust Techniques
Method:Blind Baking, Oven Baking
Cuisine:American
Diet:Vegetarian
Ingredients
For 1 single 9-inch crust:
1 ¼ cups all-purpose flour (150g)
½ cup (1 stick) unsalted butter, cold and cubed (113g)
1 tablespoon granulated sugar
½ teaspoon salt
3–5 tablespoons ice water (as needed)
For a double crust (top + bottom):
2 ½ cups all-purpose flour (300g)
1 cup (2 sticks) unsalted butter, cold and cubed (226g)
2 tablespoons granulated sugar
1 teaspoon salt
6–10 tablespoons ice water
Instructions
Prepare the pie dough using a standard pie crust recipe and chill well.
Roll out the crust and place it into each type of pie pan: glass, ceramic, metal, and disposable.
Blind bake all crusts at the same temperature for the same amount of time.
Remove from the oven and observe browning, texture, and structure.
Compare results, noting which pans produced the most even browning and best crust stability.
Notes
A glass pan is ideal for beginners because you can monitor browning.
Ceramic pans excel in presentation and are perfect for deep-dish fruit pies.
Metal pans heat quickly and help achieve firmer, crispier crusts—especially dark metal.
Disposable pans work surprisingly well and are perfect for transporting or gifting pies.
Always check whether glass pans are freezer-to-oven safe before baking a frozen pie.


