I love how the deep, authentic flavor comes from real dried red chile pods rather than canned sauce. When I toast and simmer whole chiles, I get a rich earthiness and natural heat that shortcuts simply cannot match.
I appreciate that this recipe reflects true comfort food with cultural roots. Every bite feels connected to tradition and patient cooking.
I also enjoy that the ingredients are simple pantry staples, yet the results are powerful. I do not need complicated techniques—just time and care.
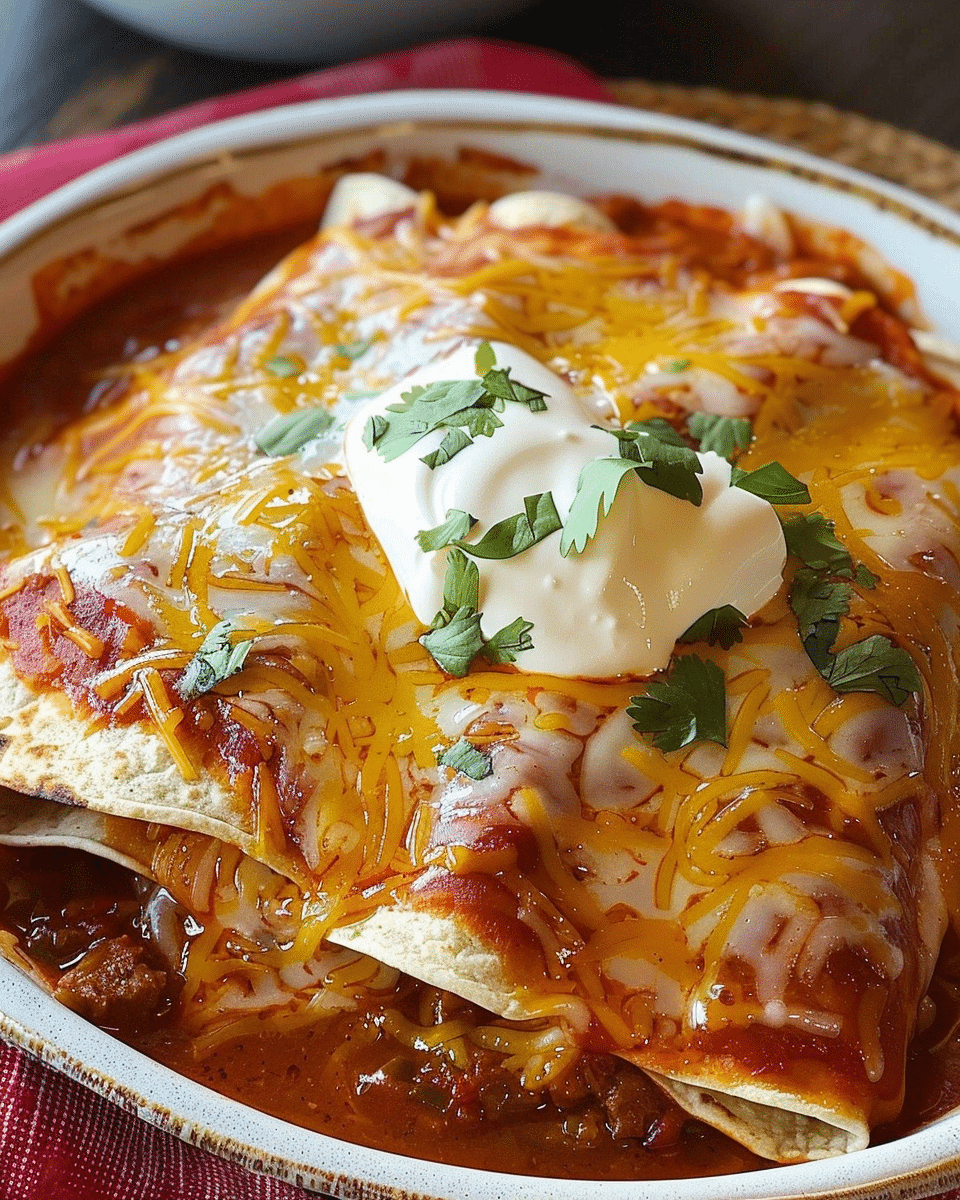
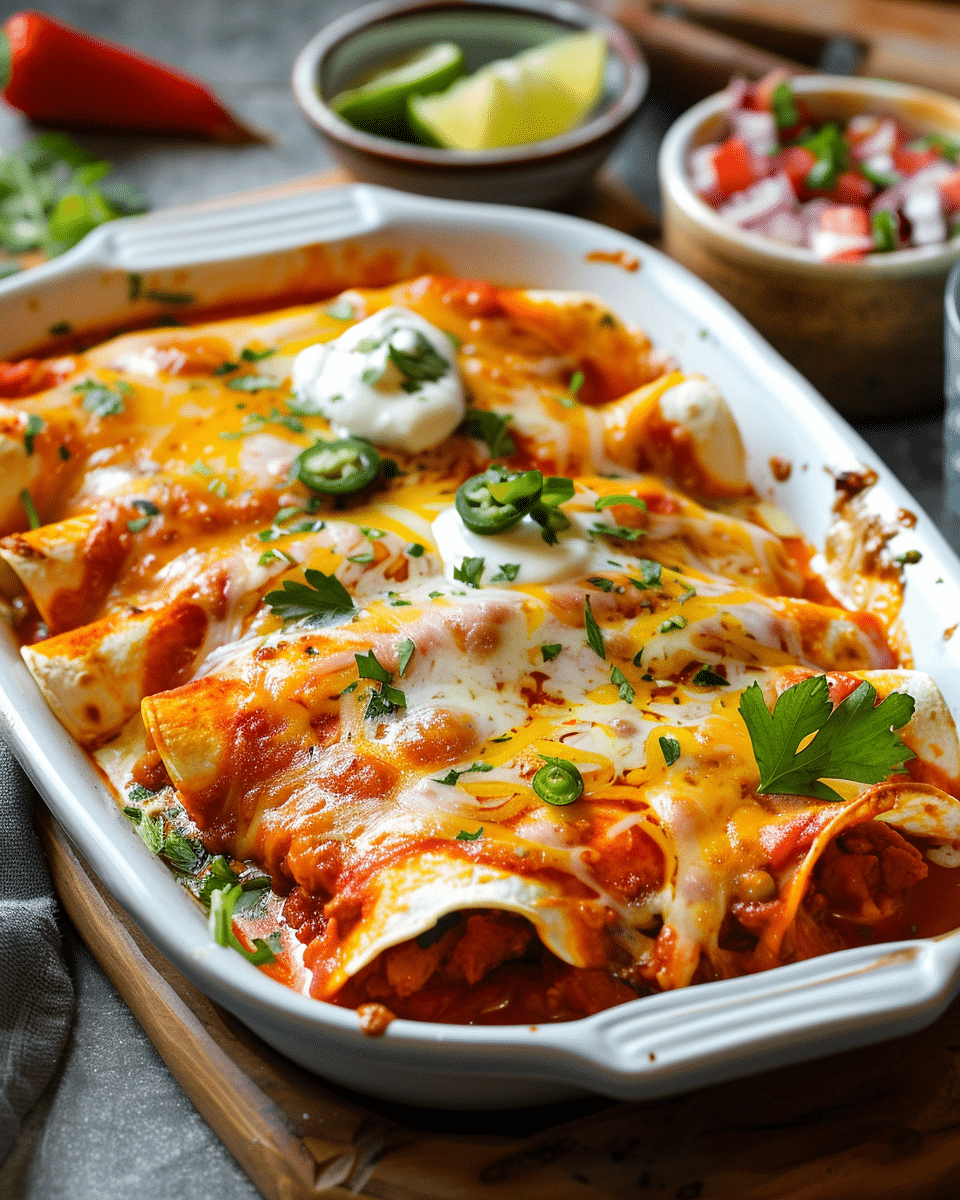
I find the balance of heat and richness especially satisfying. The slow-simmered chile sauce brings warmth, while the melted cheese and tender corn tortillas provide a creamy contrast.
I like that I can easily adjust the spice level, cheese choice, or toppings depending on who is at my table. The sauce develops beautifully with a long simmer, rewarding patience with deeper flavor.
Ingredients
(Here’s a tip: Check out the full list of ingredients and measurements in the recipe card below.)
8 dried red chile pods (New Mexico or Guajillo)
2 cups hot water for soaking
1/2 small white onion, chopped
3 cloves garlic, minced
1 teaspoon salt, or to taste
1 tablespoon vegetable oil
8–10 corn tortillas
2 cups shredded cheese (queso fresco, Monterey Jack, or cheddar)
1/2 cup finely diced white onion for topping (optional)
Chopped fresh cilantro for garnish
Crumbled queso fresco or cotija for serving
Directions
I start by lightly toasting the dried red chile pods in a cast-iron skillet over medium heat for about 30 seconds per side, just until fragrant. I make sure not to over-toast them, as that can cause bitterness.
I remove the stems and seeds, then soak the chiles in very hot water for 15–20 minutes until softened.
Next, I blend the softened chiles with chopped onion, garlic, salt, and about 1 cup of the soaking water until smooth. If needed, I add soaking liquid gradually to achieve a pourable consistency.
I heat the vegetable oil in a skillet over low heat, pour in the sauce, and let it simmer gently for 2–3 hours, stirring occasionally. I adjust the thickness with small splashes of water if necessary. The sauce should be smooth and slightly loose, similar to a thin gravy.
While the sauce simmers, I lightly fry each corn tortilla in a small amount of oil for 5–10 seconds per side. This step prevents tearing and sogginess. I drain them on paper towels.
To assemble, I dip each tortilla briefly into the red chile sauce, coating both sides. I fill each with a handful of shredded cheese, roll tightly, and place seam-side down in a baking dish.
If I want extra cheese on top, I sprinkle a small amount over the enchiladas. I bake them at 375°F (190°C) for about 10 minutes, just until warmed through and slightly melted.
I let them rest for 5 minutes before garnishing with diced onion, fresh cilantro, and crumbled queso fresco.
Servings and timing
This recipe makes about 4 servings, with 2 enchiladas per person.
Preparation time: 25 minutes Sauce simmering time: 2–3 hours Assembly and baking time: 20 minutes Total time: Approximately 3 hours
Variations
I sometimes blend New Mexico and guajillo chiles for a more complex flavor. If I want more heat, I leave in a few seeds or add a hotter chile variety.
For a richer filling, I add shredded chicken or seasoned ground beef, though I like keeping it cheese-focused for authenticity.
When I want a lighter version, I reduce the cheese slightly and focus on the sauce as the star.
I also enjoy making stacked enchiladas instead of rolled ones for a more rustic presentation.
storage/reheating
I store leftover enchiladas in an airtight container in the refrigerator for up to 4 days. The flavor often deepens by the next day.
To reheat, I cover them with foil and warm them in a 325°F oven until heated through. If they look dry, I spoon a little water or extra sauce over the top before reheating.
If I freeze them, I wrap them tightly and store for up to 2 months. I thaw overnight in the refrigerator before rehearming gently in the oven.
FAQs
Can I make the red chile sauce ahead of time?
Yes, I often prepare the sauce a day in advance because the flavor improves as it rests. I refrigerate it for up to 5 days or freeze it for up to 3 months, reheating gently with a splash of water if needed.
Why does the sauce need to simmer so long?
I find that slow simmering removes bitterness and allows the chiles to fully break down. The long cook transforms the sauce into something smooth, earthy, and deeply aromatic.
Do I have to fry the tortillas first?
I highly recommend it. When I skip this step, the tortillas tend to tear or become soggy. Even a quick 5–10 second fry makes a noticeable difference.
How spicy are these enchiladas?
The heat depends on the chiles I use. New Mexico and guajillo chiles are usually mild to medium. I adjust the spice by leaving in some seeds or blending in a hotter chile.
How do I prevent the sauce from tasting bitter?
I avoid over-toasting the chiles and always remove the seeds and stems. I also make sure to simmer the sauce gently and taste for salt at the end, adjusting gradually.
Conclusion
Authentic Red Chile Enchiladas remind me that patience and simplicity create the most meaningful meals. I rely on dried chiles, careful simmering, and minimal ingredients to let the sauce shine. The result is a deeply comforting, chile-forward dish that feels both traditional and timeless.
Authentic Red Chile Enchiladas made with real dried chile pods, corn tortillas, and melty cheese. This traditional Southwestern dish features a slow-simmered chile sauce packed with deep, earthy flavor and comforting heat. A simple yet soulful Mexican classic perfect for family dinner.
Author:Ella
Prep Time:30 minutes
Cook Time:2 hours 30 minutes
Total Time:3 hours
Yield:4 servings (8 enchiladas)
Category:Main Course
Method:Stovetop & Baked
Cuisine:Mexican / Southwestern
Diet:Vegetarian
Ingredients
For the Red Chile Sauce:
8 dried red chile pods (such as New Mexico or Guajillo)


