I like this recipe because it creates a soft and fluffy cake that works perfectly as the base for many different bento cake designs. The ingredients are simple, and the batter comes together quickly, which makes the baking process easy and enjoyable.
Another reason I enjoy making these cakes is the creative freedom they offer. I can decorate them with cute messages, pastel colors, sprinkles, or fruit depending on the occasion. Each cake can look completely different even though the base recipe stays the same.
I also appreciate that bento cakes are small and practical. They are perfect for small celebrations, personal gifts, or even when I simply want a homemade dessert without baking a large cake.
Ingredients
(Here’s a tip: Check out the full list of ingredients and measurements in the recipe card below.)
1 cup all-purpose flour (or almond flour for gluten-free) 1/2 cup granulated sugar (or coconut sugar) 1/4 cup unsalted butter, softened (or plant-based butter) 1 large egg (or 1/4 cup applesauce) 1/3 cup milk (almond or oat milk) 1 teaspoon vanilla extract 1 teaspoon baking powder 1/4 teaspoon salt
For frosting (basic buttercream used for decorating):
1/2 cup unsalted butter, softened 1 1/2 cups powdered sugar 2 tablespoons cream or milk 1 teaspoon vanilla extract
Directions
I start by preheating the oven to 350°F (175°C) and lining a 4-inch round cake pan so the cake releases easily after baking.
To prepare the batter, I cream the softened butter and sugar together in a bowl until the mixture becomes light and fluffy, which usually takes about three minutes. I add the egg and vanilla extract and mix everything until well combined.
In another bowl, I whisk together the flour, baking powder, and salt. I gradually add the dry ingredients to the butter mixture while alternating with the milk. I mix until the batter becomes smooth and well combined.
I pour the batter into the prepared pan and gently smooth the top. The cake bakes for about 22 to 25 minutes until a toothpick inserted into the center comes out with a few moist crumbs.
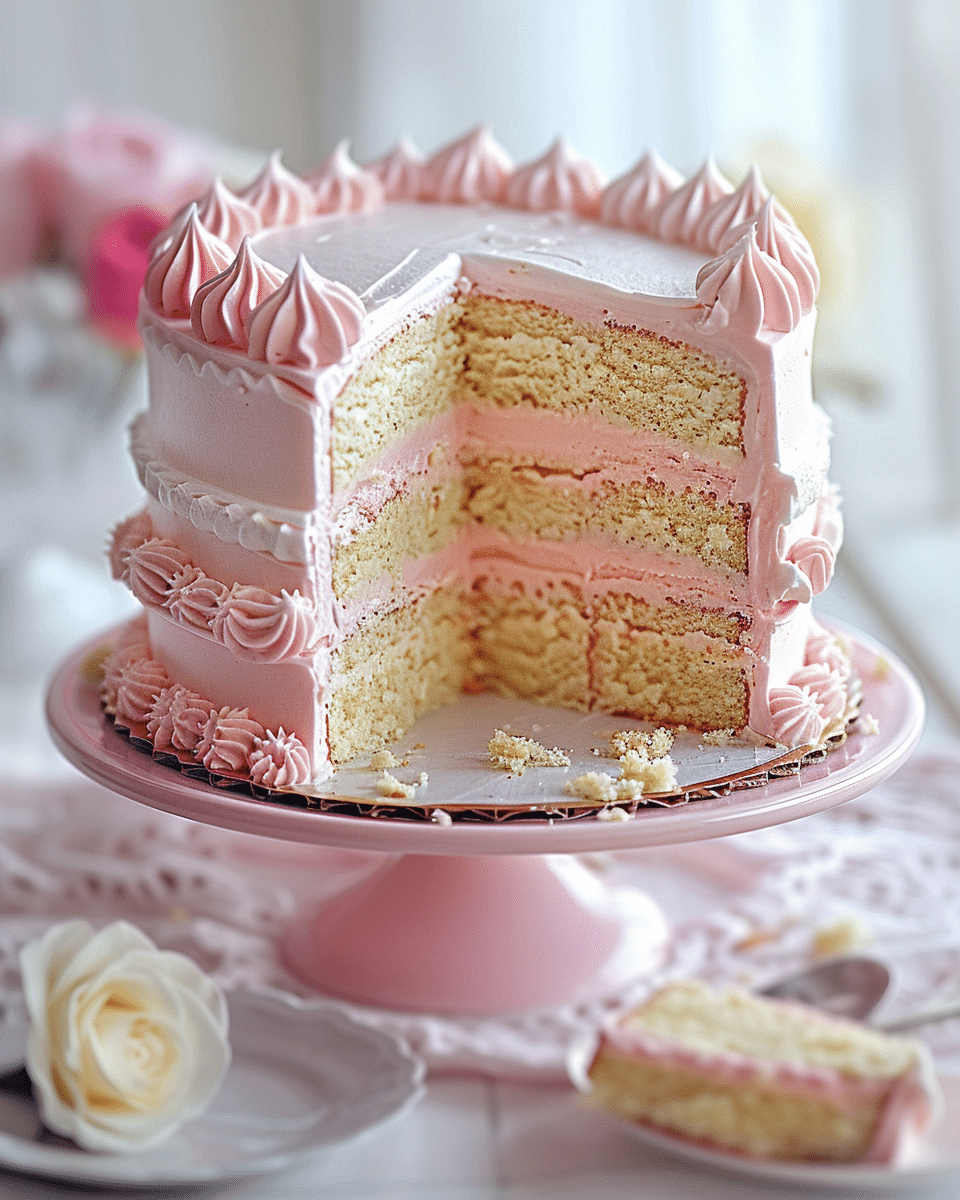
After baking, I let the cake cool in the pan for about ten minutes before transferring it to a cooling rack. Once it is fully cooled, I level the top and slice it horizontally into two or three thin layers.
For the frosting, I beat the butter until it becomes creamy. I add powdered sugar, cream, and vanilla extract, then continue beating for about five minutes until the frosting becomes light and fluffy. I set aside one third of the frosting for the outer layer and color the rest if I want different decorations.
I spread frosting between the cake layers and apply a thin crumb coat around the cake. I chill the cake for about fifteen minutes to help the frosting set. After chilling, I add the final layer of frosting and decorate with piping bags, edible markers, sprinkles, or berries depending on the design I want.
Servings And Timing
Servings: 4 mini cake portions
Prep time: 30 minutes Bake time: 22–25 minutes Chill time: 15 minutes Total time: about 2 hours
Variations
I like experimenting with different decoration styles to turn one simple cake recipe into many creative bento cake designs.
For a minimalist bento cake, I frost the cake with smooth pastel buttercream and write a short message in the center.
For a heart-themed cake, I pipe small hearts around the edges using colored frosting. This design works beautifully for birthdays or small celebrations.
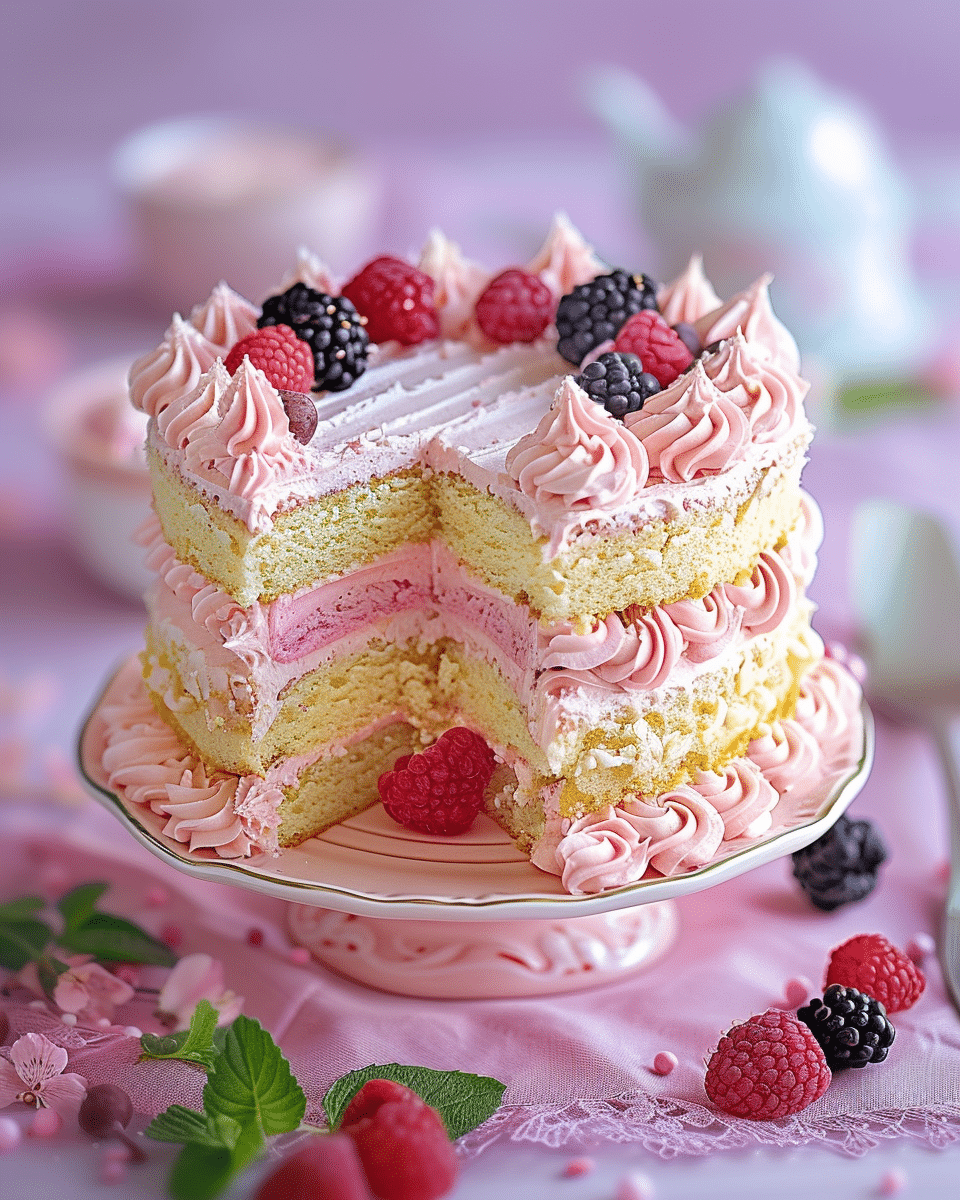
For a fruit bento cake, I decorate the top with fresh strawberries, blueberries, or raspberries. The fruit adds both color and a refreshing flavor.
For a chocolate version, I replace a few tablespoons of flour with cocoa powder and decorate with chocolate shavings.
For a sprinkle cake, I coat the sides with colorful sprinkles and keep the top simple with a small message.
For a floral design, I pipe small buttercream flowers using different colors to create a soft and elegant look.
For a cartoon-style cake, I outline simple shapes with frosting and color them with bright shades for a playful appearance.
Storage/Reheating
I usually store bento cakes in an airtight container in the refrigerator for up to three days. Keeping them chilled helps the frosting hold its shape and keeps the cake fresh.
Before serving, I sometimes let the cake sit at room temperature for about ten to fifteen minutes so the texture becomes softer.
If I want to store the cake for a longer time, I wrap it carefully and freeze it for up to one month. I thaw it overnight in the refrigerator before serving.
FAQs
What Is A Bento Cake?
I consider a bento cake a small single-serving or mini celebration cake, usually about four inches in size, often decorated with simple designs or messages.
Can I Make Bento Cakes Without Special Cake Pans?
Yes, I sometimes bake the cake in a regular pan and cut out small circles using a round cutter to create the mini cake layers.
Can I Use Different Flavors For The Cake Base?
Yes, I often change the flavor by adding cocoa powder, citrus zest, or different extracts like almond or lemon.
What Frosting Works Best For Bento Cakes?
I prefer buttercream frosting because it spreads smoothly and holds decorations well, especially for piping designs.
Can I Prepare The Cake Layers In Advance?
Yes, I sometimes bake the cake layers a day ahead and keep them wrapped in the refrigerator until I am ready to decorate.
Conclusion
I enjoy making bento cakes because they combine baking with creativity. The small size makes them charming and personal, while the simple cake base allows me to experiment with many decoration styles.
With a few basic ingredients and some imagination, I can turn one small cake into a unique dessert that feels special for any occasion.
The best bento cake ideas featuring trendy mini cakes with fun decorations and sweet flavors. These small homemade cakes are perfect for celebrations, gifts, and beginner bakers.
Author:Ella
Prep Time:25 minutes
Cook Time:25 minutes
Total Time:50 minutes
Yield:2 hours (including cooling & decorating)
Category:4 servings
Method:Dessert
Cuisine:Baking
Ingredients
For the Cake
1 cup all-purpose flour (or almond flour for gluten-free)
½ cup granulated sugar (or coconut sugar)
¼ cup unsalted butter, softened (or plant-based butter)
1 large egg (or ¼ cup applesauce for egg-free)
⅓ cup milk (almond or oat milk works too)
1 teaspoon vanilla extract
1 teaspoon baking powder
¼ teaspoon salt
For the Frosting
½ cup unsalted butter, softened
1½ cups powdered sugar
2 tablespoons cream or milk
1 teaspoon vanilla extract
Food coloring (optional)
Optional Decorations
Sprinkles
Fresh berries
Edible markers
Colored piping frosting
Instructions
Step 1: Prepare the Batter
Preheat your oven to 350°F (175°C) and line a 4-inch round cake pan with parchment paper.
In a bowl, cream butter and sugar until light and fluffy (about 3 minutes).
Add the egg and vanilla extract, then mix until smooth.
Step 2: Mix and Bake
In a separate bowl, whisk together flour, baking powder, and salt.
Gradually add the dry ingredients to the butter mixture, alternating with milk.
Mix until just combined.
Pour the batter into the prepared pan and smooth the top.
Bake for 22–25 minutes, until a toothpick inserted comes out with a few moist crumbs.
Step 3: Cool and Level
Allow the cake to cool in the pan for 10 minutes, then transfer to a cooling rack.
Once fully cooled, level the cake and slice it horizontally into 2–3 layers.
Step 4: Make the Frosting
Beat butter until creamy.
Add powdered sugar, cream, and vanilla extract, and beat for 5 minutes until fluffy.
Reserve ⅓ of the frosting for the outer layer and color the remaining frosting if desired.
Spread frosting between cake layers and apply a crumb coat.
Chill the cake for 15 minutes.
Step 5: Decorate
Apply the final frosting layer.
Use piping bags, edible markers, sprinkles, or berries to decorate.
Write cute messages or create simple designs for the classic bento cake look.
Notes
Pan Size: A 4-inch cake pan creates the classic mini bento cake size.
Make Ahead: Bake the cake layers a day ahead and store wrapped in the refrigerator.
Flavor Variations: Add cocoa powder for chocolate cake or lemon zest for a citrus flavor.
Storage: Store in the refrigerator for up to 3 days.


